02. Option 1 Udacity Marketing Challenge
For the Udacity Marketing Challenges, we have set up specific websites landing pages Digital Marketing Nanodegree (DMND) Program and Udacity Enterprise’s DMND Corporate Training that you will direct your audience to. Have a look at the landing pages and reflect on what your ads need to communicate to match these pages.
Keep in mind: if you have chosen to promote the DMND program, you will want to create ads that promote the free eBook (Social Media Advertising Guide), not the program itself. For Enterprise, make sure to promote the DMND Nanodegree program to generate bulk seat purchases by companies.
These landing pages have the Facebook Tracking Pixel embedded, which allows you to track the success of your campaign. So when someone fills in the form to download the eBook or submit their contact information for Enterprise, you can actually measure this conversion in the Facebook Ads Manager. To do this, we’ll have to select the ‘Conversions’ objective on Facebook, more details about that later.
You will have an advertising budget of $100 that will be billed directly to Udacity and is included in the program price you have paid.
A. Signing up to Facebook Ads Manager
To get started on this project:
- Sign up for Facebook and sign into your account.
(If you already have a Facebook account, please sign into your account once you're ready to start the project.) - Request access to DMND's Facebook Business Manager account by filling out the form below to request your student ID and access to the Facebook Business Manager. You will receive an email with an access link and your student ID (please save your ID as you will use it for the rest of the program) within 3 business days.
- Once you have been added you to our accounts, you'll have account access for 3 weeks, so please plan accordingly.
B. Email from Facebook
Be on the lookout for an email from Facebook <notification@facebookmail.com> with the Subject line: DMND has invited you to work on their business on Facebook. The content of the email would look like the snapshot below.
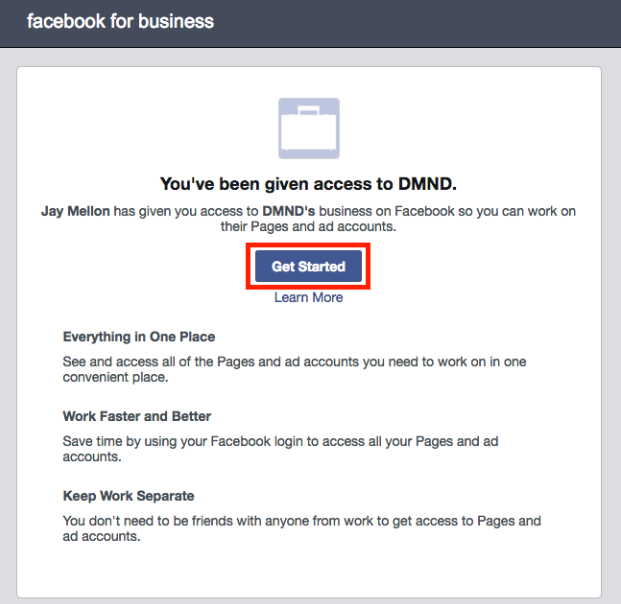
Verify your account by clicking on Get Started in the email you receive from Facebook.
C. Access the Facebook Business Manager
The following are the steps to access the Facebook Business Manager account.
- Enter your full name, and click on Continue button.

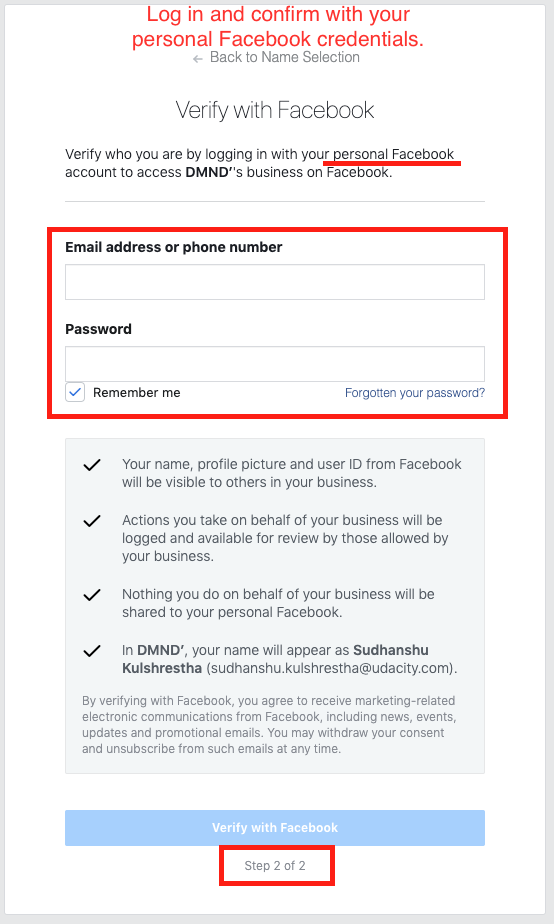
- Log in and confirm with your Facebook credentials, and click on Verify with Facebook button.
- The snapshot below shows a successful login to the Facebook Business Manager. Choose the DMND account from the top-right drop-down menu items, and go to the Ads Manager.
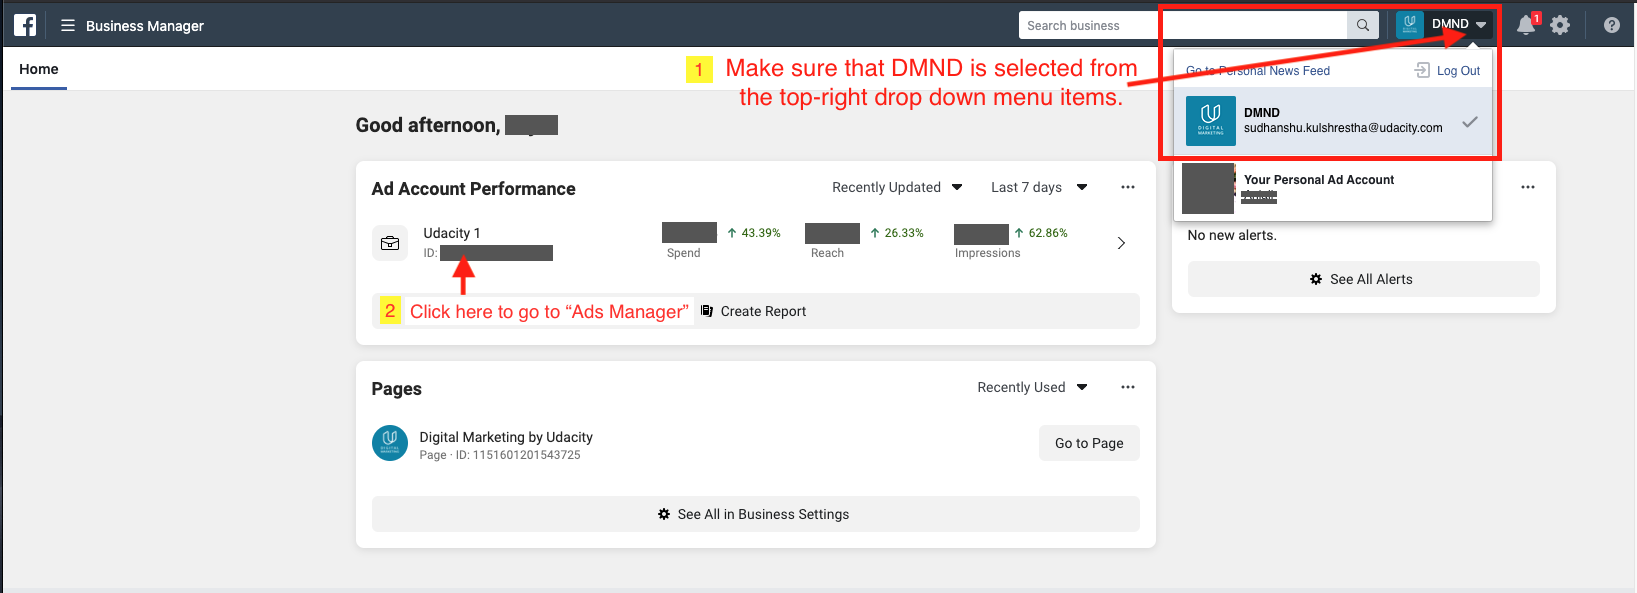
A first-time successful login to Facebook Business Manager
D. Facebook Advertising Policies
You will be redirected to the Ads Manager dashboard, where it will first prompt you to review and understand Facebook's Advertising Policies. See the snapshot below.
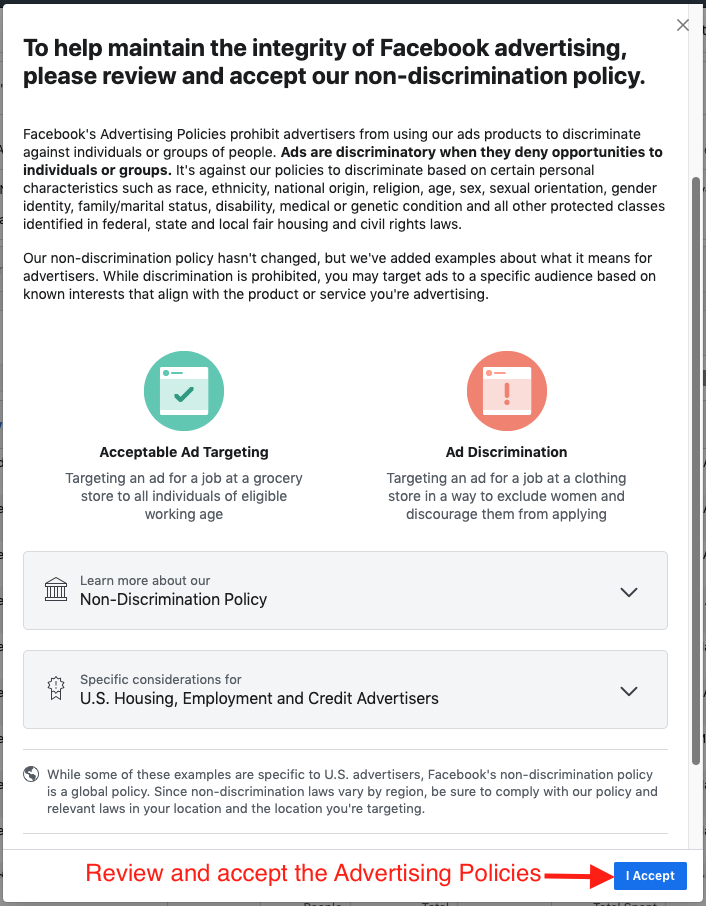
It's a good practice to familiarize yourself with Facebook's Advertising Policies before jumping into the platform. Whether you're working on this project or plan to run Facebook campaigns on your own account in the future, you want to be sure you are abiding by Facebook's terms. Violating any of their advertising policies could result in suspension from the tool.
E. Notification Settings
I. Ad Notification Settings
Follow the steps below to turn OFF the "Ad Account Notifications" to ensure you are not bombarded with emails anytime someone adds or updates something in the Campaign Manager.
- Click on the "Business Manager" on the top-left, and select "Ad Account Settings".
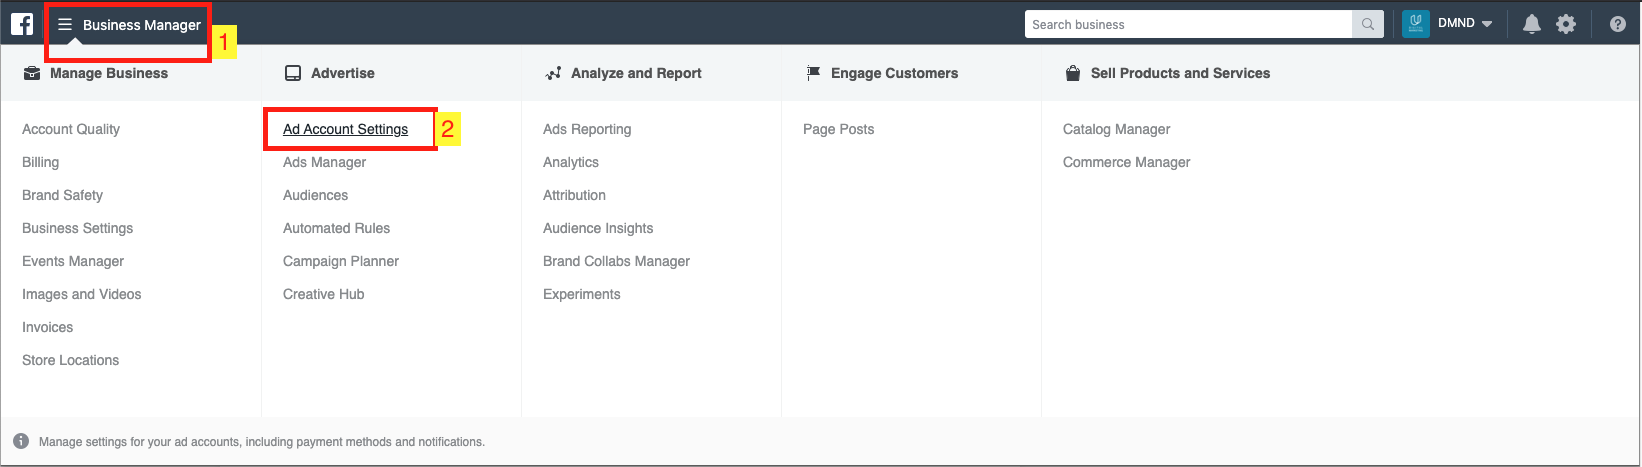
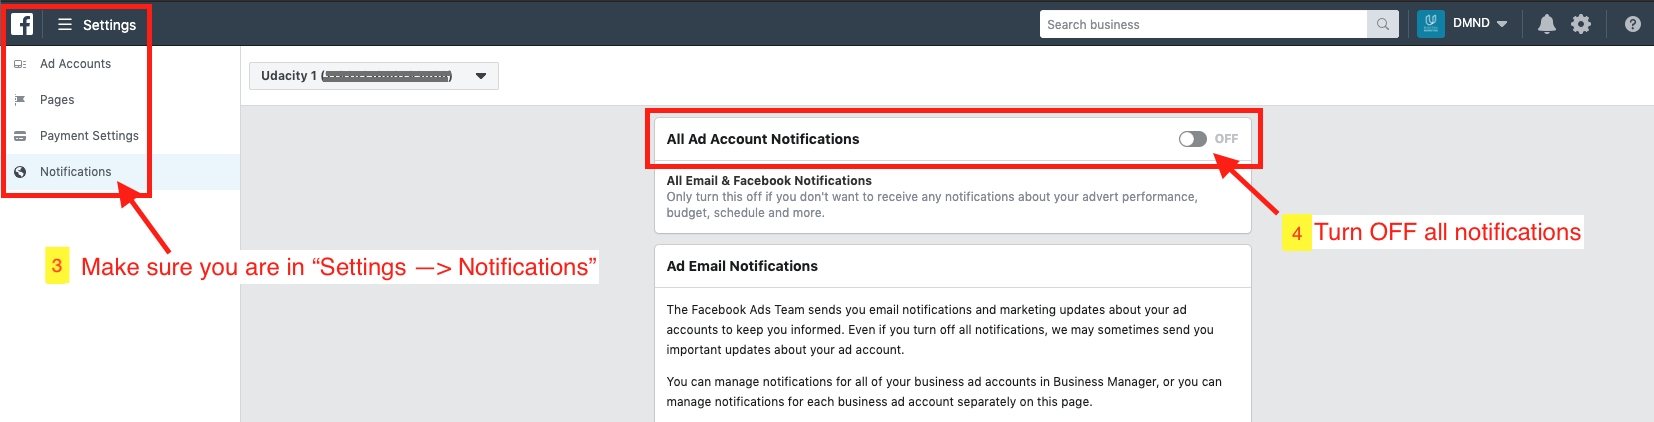
Choose the "Notifications" item from the left menu pane. Alternatively, you can directly click on this link: Ad Account Notifications Settings
Turn OFF the "All Ad Account Notifications," this will turn off all notification for ads. See the snapshots below.

II. Business Notification Settings
You will want to turn OFF the notifications related to the Business, such as Pages, WhatsApp accounts, Catalogs, Pixels, or Apps. Follow the steps below to turn OFF the "Business Notifications".
- Go to the Business Manager --> Business Settings, as shown in the snapshot below.
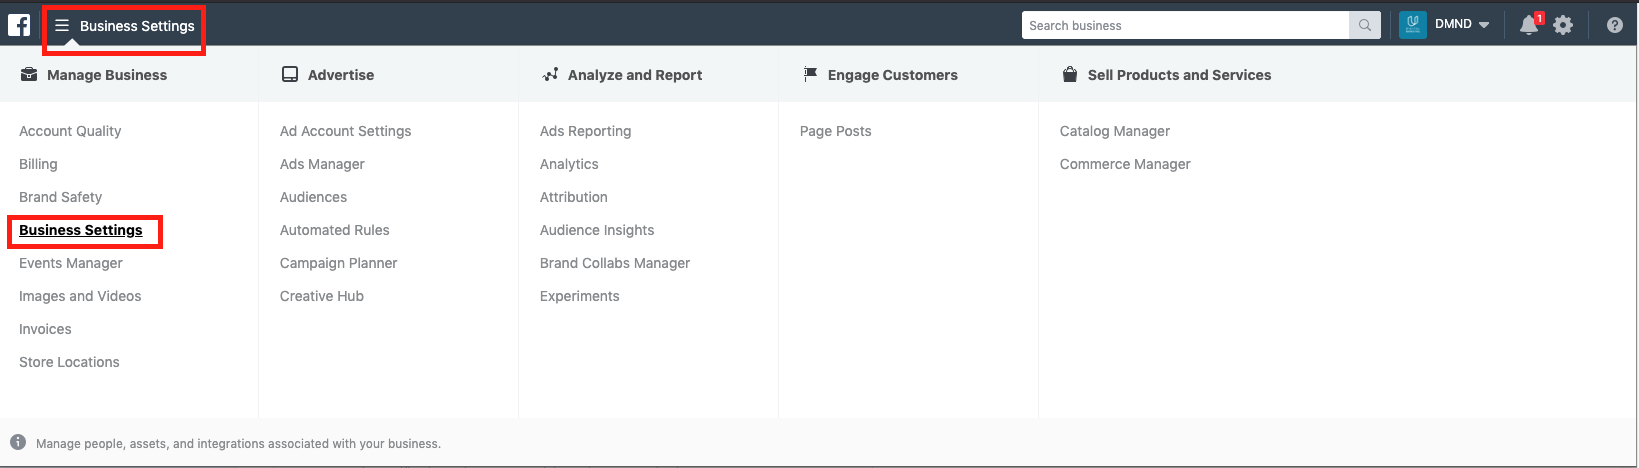
Navigate to the "Business Settings"
- Choose the "Notifications" item from the left menu pane. Turn OFF the undesirable notifications related to the Business.
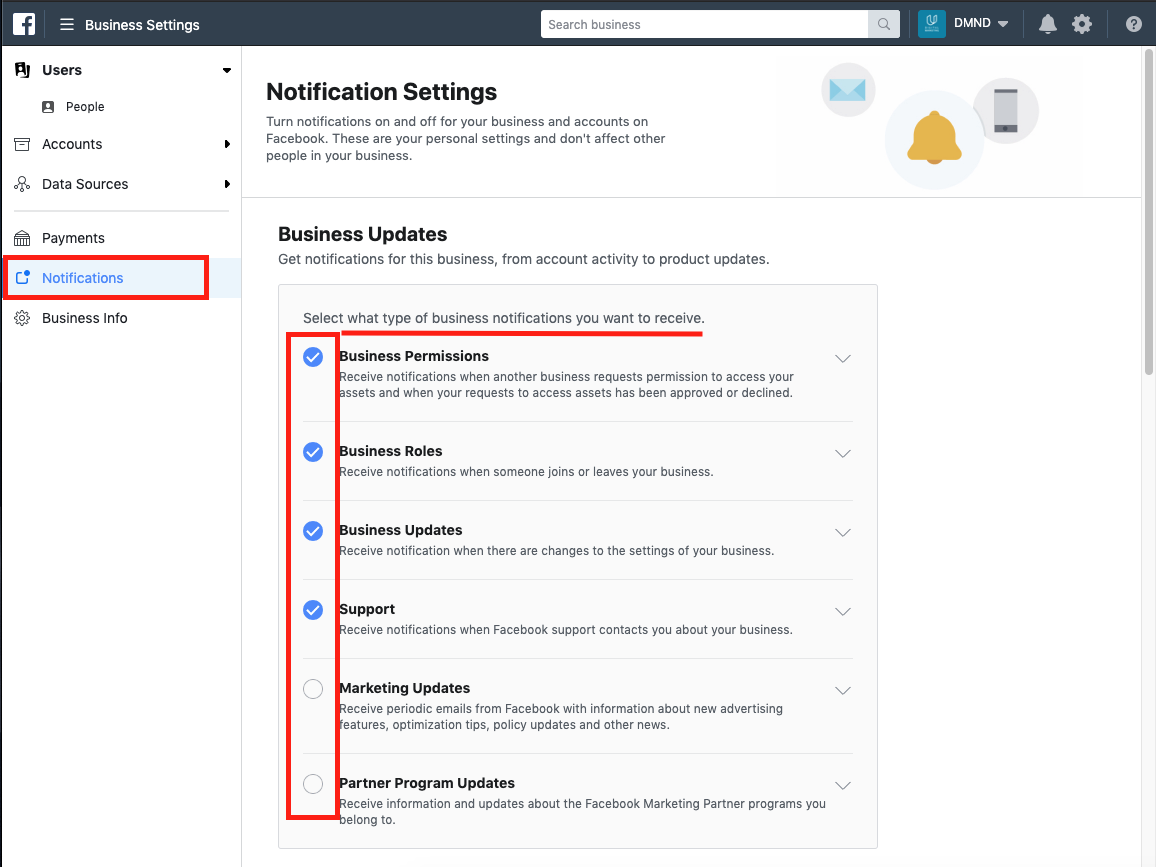
Turn off the undesirable notifications
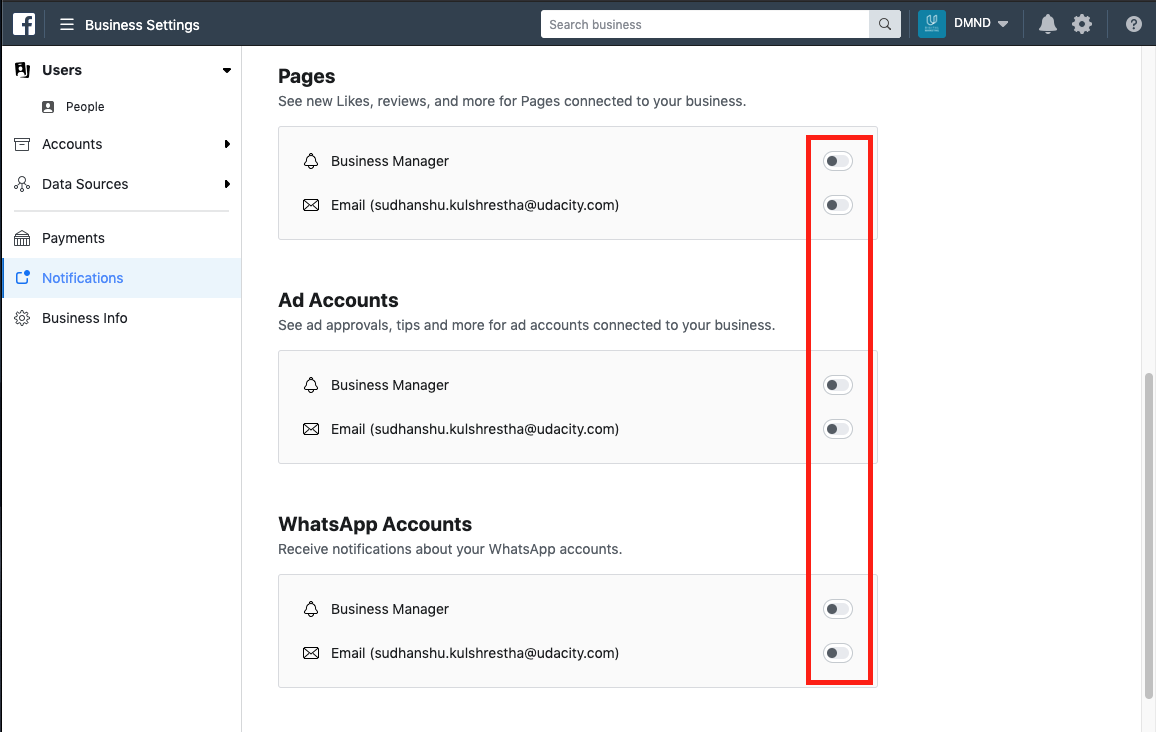
Turn off notifications for Business Pages, Ads, and WhatsApp
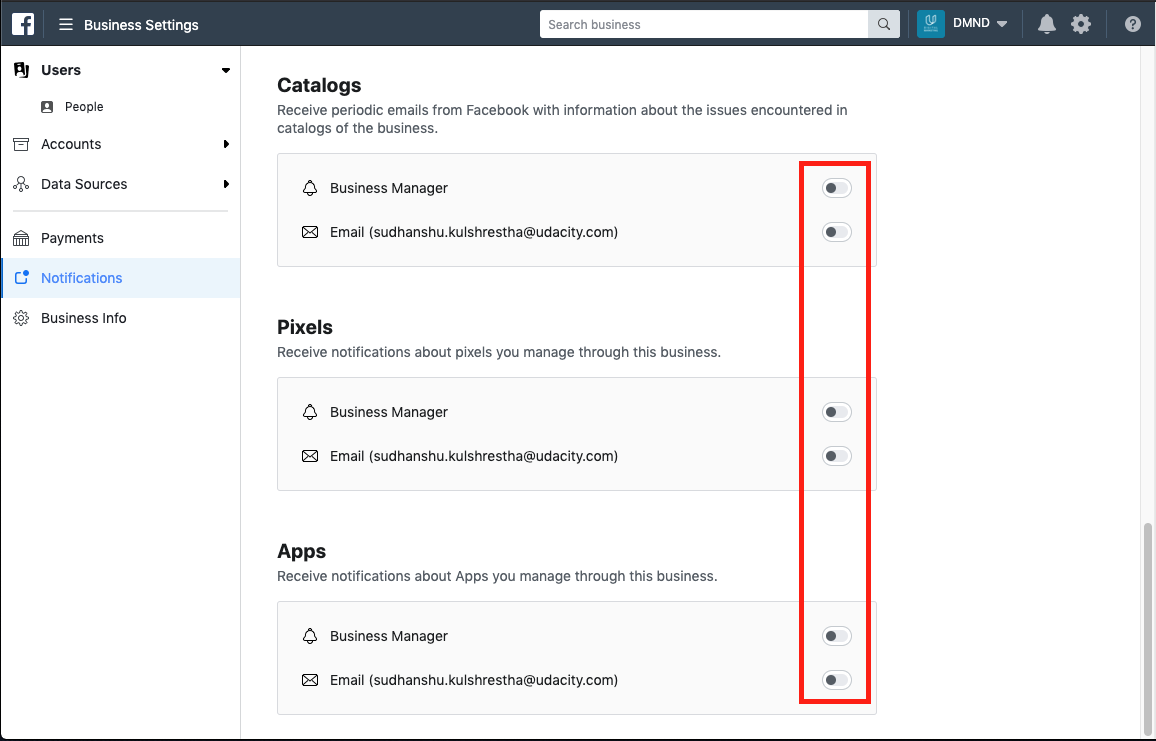
Turn off notifications for Business catalogs, Pixels, and Apps
NOTE: Facebook's Business Manager User Interface may change over time. We advise students to follow a similar set of steps to turn OFF the notification.